Introduction
If you live and work in your RV like we do, you use it not only as an apartment but also as an office. As a result, we have a few more consumers that we need to work every day and who need their dose of electricity several times a day. In addition, since we cannot and do not want to stand on a pitch every day, we need a power source that is independent. A power generator, a chugging unit, is out of the question. It stinks and makes noise.
If you want to keep it affordable, the best option is to install a solar panels system on the roof of the RV. I put the basics, considerations, planning, purchasing and implementation online here.
You can use it to build your own solar system on your RV.
A list of our consumers gives an indication of how much electricity we need every day. I go into the calculation below:
- Laptops
- Tablet
- Smart phone
- Wifi router
- Raspberry Pi mini computers
- E-book reader
- Speakers and radio
- Water pump
- Heating
For budget reasons, we decided to plan and install the solar system ourselves. Even if I’m not the super handyman, that shouldn’t be a problem for me. Everything I’ve learned I’m making available to you for free in this article. If you read this article, you will save yourself a lot of research.
12 volts or 220 volts?
An important question when it comes to electricity and motorhomes. Many technical devices that we use in our everyday life, such as a hair dryer, work with 220 volts. However, these often have a power pack that transforms the electrical voltage down from 220 to 24, 12 or even less volts. To operate 220 volt devices in the RV, you need a power inverters (such as 3000w power inverter). If you now connect a 220 volt device with a power supply unit, the voltage is transformed from 12 volts to 220 volts by the inverter and back to 12 volts by the power supply unit.
Inverters also put a strain on the batteries due to the high current consumption. Likewise, hair dryer, mini oven and coffee machines. Therefore, I advise you to completely do without 220 volt devices and to rely on 12 volt devices. There are also 12 volt versions for almost every device.
The Basics of RV Solar Systems
The power in your motorhome comes from two or more RV batteries. One is the starter battery. This is usually located in the engine compartment. It is there to start the engine and to supply power to the lights, turn signals, etc. The other battery (can also be 2 or more) is the consumer battery. This feeds the lighting, pumps, refrigerator, etc. Both batteries are charged by the alternator while driving. Of course, if your RV is stationary, the batteries will not be charged. The solar system should change this state and charge the batteries even when stationary. You can find a detailed article on batteries in motorhomes here.
The solar system consists of the solar modules (solar cells) and a charge controller. The charge controller checks whether the battery is full and if not, it is charged using the current that comes from the solar cells. If the battery is full, the regulator cuts the current. If a consumer draws electricity, it is recharged until the battery is full.
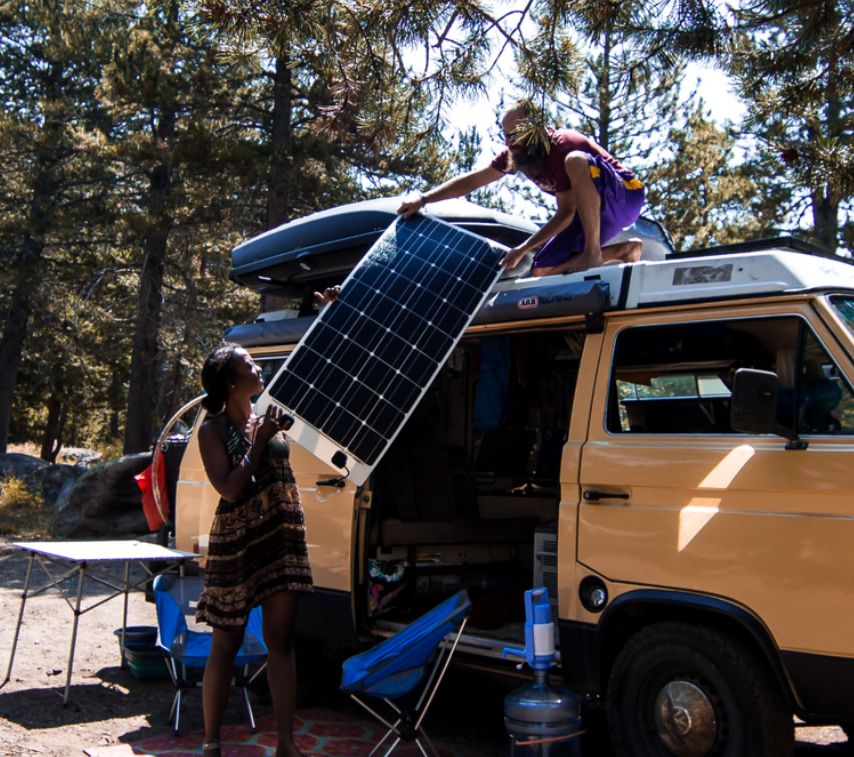
Solar on the RV roof
The solar modules are glued to the roof, where the sun shines the most. There are special adhesives and brackets for this. It is also important that the modules are ventilated. If you stick them directly to the roof, they get too hot and don’t perform as well. There should be a distance of at least 2 centimeters.
I wanted to glue the modules directly onto the alcove. The idea behind it was that the solar panels absorb the sun. As a result, not so much heat comes through and the alcove is more pleasantly tempered in the sun. However, since it is tilted forward and therefore there is no straight surface, this did not work.
Solar modules have the best efficiency, i.e. the best electricity yield, when the sun shines on them at an angle of 90 degrees. Since the sun moves throughout the day and also has different angles depending on the season, the solar modules would always have to track the sun. They should be rotatable and tiltable. Ideally, they should also automatically follow the sun. With such a system, twice as much electricity can be generated, but at the same time it is expensive and often not worthwhile for such a small system on the roof.
The most commonly used solution is mounting brackets, which can be used to manually fold up the modules on the roof so that they are better aligned with the sun. Disadvantage: You have to climb onto the roof every time. And the mounts are expensive.
For this reason I decided to put one more module on the roof. It’s cheaper and I don’t have to climb onto our RV roof several times a day to open and close the modules.
Since I will be installing several modules, it is important to connect them in parallel. I connect the plus pole to the plus pole and the minus pole to the minus pole, because I want to keep the voltage of a module and gain more current.
Polycrystalline or monocrystalline
If you have already dealt with the topic, you will certainly have heard these two terms. I’ll keep my explanation short:
Monocrystalline solar panels are often more efficient than polycrystalline ones. However, they are also more expensive to manufacture due to the use of more silicon. Another advantage of the mono cells is that they are less sensitive to partial shading. So if a branch casts some shadows on part of the solar cell, a monochristalline will generate a little more electricity.
With the small areas on a RV, however, the differences should be rather small. So I would say it doesn’t matter which modules you buy.
How do I have to dimension the solar system?
At the beginning I listed which consumers we had to supply with electricity. In order to achieve this with a solar system, three things must be dimensioned sensibly:
- The solar panels
- The solar controller
- The batteries
In order to find out how you have to dimension your system, you should, like us, first think about which consumers you have in the RV. Then how much voltage (volts) they need and how many watts they use and how long each runs a day. This results in the required power, energy and electrical charge. If you add up the individual charges of the devices, you get the amount of charge you need per day. From solar power calculators you can determine which batteries you need and how large your solar panels should be.
Battery Size Calculation
We have a consumption of around 55 Ah every day. This value is calculated very conveniently. For example, I charged the two laptops twice a day in my bill. When it comes to lighting, we also save electricity by using LEDs instead of normal halogen lamps.
In order to finally test the required storage capacity of the battery, I still have to know how many days I want to stand autonomously. Or to put it another way, how many days of bad weather (when the battery is not charged) do I want to calculate? Since we are flexible, 3 days are enough for me. Until then, we either drove into the better weather or, if necessary, to a place with electricity.
So I need 3 x 55 Ah = 165 Ah. Two 85 Ah starter batteries are installed in our RV. These are far from optimal for the purpose. These batteries are there to provide very high currents for a short time and then almost no more current. With consumable batteries, however, we tend to need little power in the mobile in the long term. Also, such batteries should not be discharged more than 20%, otherwise they will break down fairly quickly. So we’re left with 26 Ah if we don’t want to damage it. That’s not even enough for one day. So we have to buy new batteries together with the solar system. It is important to look at the depth of discharge here. Most deep cycle batteries can take 50-70%. More on this in the battery article.
Update: In the meantime, we have installed two cycle-proof wet batteries, each with 120 Wh, as body batteries. We are now comfortably free for many days.
The solar panels
Solar panels have different parameters that you should know in order to make a decision:
First there is the maximum power Pmax in watts. You can find this number on every solar panel. I bought 100 watt panels.
Next, the voltage in volts. That’s 18 volts on my panels.
In addition, the maximum current in amperes, for me 5.9.
You need these three key figures for the purchase and the comparison. The panels should provide enough power in one day to fully recharge your batteries. I need about 55 Ah a day and would like to get by with it for 3 days. So my system has to deliver 165 Ah per day. Less is also enough, as there is always some energy coming from the roof, even when it is cloudy.
So I bought 2 100WP solar modules to start with and can build a third one on the roof if necessary. If you don’t have that much space, buy one or two with more power. Below I recommend various modules.
The cables
Correct sizing of the cables is important. If your cables are too thin, you will quickly have high voltage drops and your solar system will produce significantly less yield than it could. The cables between the solar panels and the charge controller and the charge controller and the battery must be correctly dimensioned. The cable between charge controller and battery should be as short as possible.


Your platform has quickly become my go-to source for motivation. Thank you for sharing your thoughts.
yandanxvurulmus.kijcTkrKCkWq