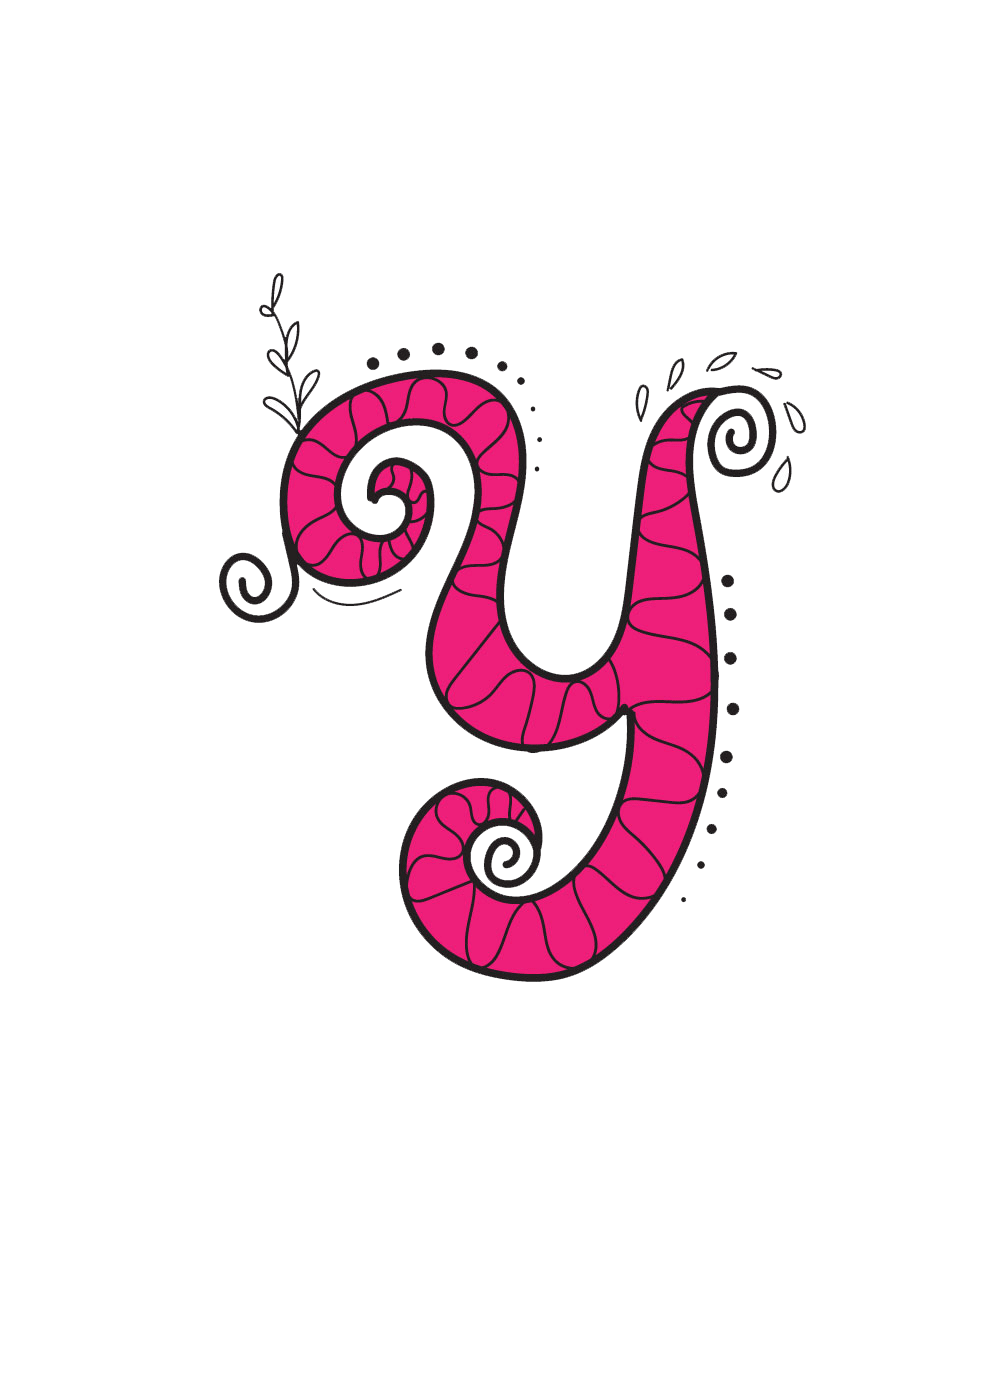
Fancy Letter Y Drawing
As the second to last letter of the letter set, the letter Y is much of the time one of the last letters we will learn. When taken in, it’s one we utilize off and on again in our daily existences. It’s a quite simple letter to compose typically, and the upper and lowercase variants of the letter are genuinely like each other.
You might think you have a universal knowledge of this letter, however we’re here to check out at the letter Y in an entirely different manner! All through the 6 stages of this aide, we will figure out how to draw an extravagant letter Y. This will be finished with a wide range of extraordinary subtleties and increments to the plan.
Stage 1:
At the point when you compose a capital letter Y regularly, you will utilize three straight lines interfacing with each other. However, that isn’t the methodology we will take for this extravagant variant! Rather than utilizing any straight lines, we will utilize just bended and adjusted lines. This might make it seem to be a lowercase Y than a capital one, yet you could utilize it for one or the other structure.
Before we start appropriately, why not rapidly sketch out a letter Y utilizing your pencil? Doing so will assist you with remembering the state of the letter as you draw. It will likewise permit you to design out the size of the letter. Then, we can define the primary boundaries of the plan. In the first place, we will define a bended boundary with a twisting on the end.
Begin by drawing a free winding shape that then, at that point, stretches out into the plunge of a bended line. It could be a piece interesting to tell where this squeezes into the letter, particularly on the off chance that you didn’t draw a pencil Y.
Stage 2:
Since you have the beginning of the left half of the letter Y, you are prepared to add the upper piece of this part! We will begin at the winding segment you started with in the initial step.
Add a sharp tip there, and afterward draw the winding turning out in a bended line. This part can look much more troublesome than it really is, so make certain to follow the reference picture intently as you draw. This twisting will transform into a bended line running lined up with the line from the past step. It will follow a similar dunk in the center and afterward go forcefully up.
Stage 3:
As guaranteed, we will currently polish off the framework of your extravagant letter Y in this step. We will start right where you left off last time! Where the plunge finished last time, we will add another sharp tip. This tip will stretch out down in a marginally wavy, wavy line. That wavy line will go way down past the foundation of the letter, and afterward will twist to one side at the base. It will twist strongly, seeming to be a tail.
That tail will have a sharp tip toward the end too. And afterward it will bend up in the future to fill the hole and associate back precisely. It’s truly not so hard as it sounds as long as you follow the picture intently! Presently you have a total framework, and you can eradicate the pencil lines you utilized in the initial step.
Stage 4:
Drawing this letter Y has introduced a few difficulties, however everything gets simpler and, surprisingly, more fun from here! In this and the following stage, we will add a subtleties to your drawing. In this specific step, we will zero in on the inside subtleties of the letter. To begin with, we defined a few winding boundaries jabbing off the two hints of the letter.
We didn’t add one to the tip of the twisting on the left as that might be winding over-burden! You could add one there assuming you like, nonetheless. Then, we needed to add a basic example to the inside of the letter. To do this, we defined wavy boundaries generally all through the letter.
Stage 5:
There are a few cool subtleties inside the inside of the letter now, and next we will add a subtleties to the outside of the letter. Above all else, we altered our perspectives on there being sufficient winding activity on the left half of the letter! You can see this as we added another winding line to the left side.
Then, we drew a few little dabs along the diagram. These went on the upper and right hand bends of the diagram. At long last, we defined another boundary jabbing off the upper left of the picture and added a few little passes on to it. This makes it seem as though there is a little plant outgrowing the letter! You’ll see that with this multitude of subtleties, we kept them rather negligible. You could add a lot a greater amount of these subtleties on the off chance that you needed, and you could adhere to a couple.
Stage 6:
Adding variety is generally a definitive method for polishing off a drawing, and that is the thing we expect to do in this last step! We show you the variety decision we would make in our model picture. To variety the letter, we added a radiant pink tone to make this image brilliant and eye-getting. In the event that you love pink, you could make yours a similar variety!
There are numerous different shades of pink you could use all things being equal, or you could likewise go with some other variety you like! You could go with yellow, as it begins with the letter Y. There are such countless open doors, and you ought to go with what feels right.